Polymerase Chain Reaction (PCR) is one of the most powerful techniques in molecular biology, but even small mistakes can lead to failed experiments. Whether you’re performing conventional PCR or qRT-PCR, knowing how to troubleshoot common issues can save time, reagents, and frustration.
In this blog, we’ll explore the most frequent PCR problems, why they happen, and practical solutions you can apply in your lab.
1. No Amplification (PCR Failure)
Symptoms: No bands on gel, no signal in qRT-PCR.
Possible Causes and Solutions:
Poor primer design: Use a primer design tool to optimize Tm, avoid secondary structures, and check specificity.
Degraded DNA/RNA template: Ensure high-quality nucleic acids. Use RNA stabilizers for RNA samples.
PCR inhibitors: Contaminants from extraction can inhibit PCR. Purify samples or dilute template.
Example: You run PCR for a housekeeping gene but see no bands. Checking the template shows it was partially degraded switching to fresh RNA solved the issue.
2. Non-Specific Bands or Peaks
Symptoms: Extra bands on gel, multiple peaks in qRT-PCR melting curves.
Possible Causes and Solutions:
Low primer specificity: Redesign primers targeting unique regions of the gene.
Suboptimal annealing temperature: Increase the annealing temperature to improve specificity.
Too many PCR cycles: Reduce the number of cycles to minimize non-specific amplification.
Example: Your SYBR Green qRT-PCR shows two peaks in the melting curve. Increasing the annealing temperature eliminated the smaller peak, confirming specific amplification.
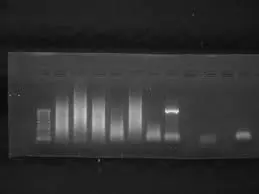
3. Smearing on Agarose Gel
Symptoms: Smear instead of a clear band.

Possible Causes and Solutions:
Degraded template DNA/RNA: Always check nucleic acid integrity before PCR.
Too much template or primer: Reduce concentrations to recommended levels.
Excessive PCR cycles: Lower the cycle number to prevent smearing.
Example: You notice smearing during amplification of a large gene. Using lower template amounts produced a clean band.
4. Low PCR Efficiency
Symptoms: Weak signal, high Cq values, or amplification curve not exponential.
Possible Causes and Solutions:
Poor primer design or secondary structures: Redesign primers, avoid self-complementarity.
Suboptimal reaction mix: Ensure correct Mg²⁺ concentration and use a high-quality polymerase.
Degraded reagents: Check the expiry of buffers and dNTPs.
Example: A qRT-PCR for a gene of interest shows low efficiency (85%). Optimizing primer design increased efficiency to 95%.
5. Contamination Leading to False Positives
Symptoms: Amplification in negative controls.
Possible Causes and Solutions:
Cross-contamination: Always use clean surfaces, filter tips, and separate pre- and post-PCR areas.
Contaminated reagents: Use fresh aliquots for primers, polymerase, and master mix.
Carry-over from previous PCR: Implement UNG (uracil-N-glycosylase) treatment if using dUTP.
Example: A No Template Control shows amplification due to previous PCR product contamination. Decontaminating the workspace fixed the issue.
Tips for Successful PCR Experiments
Always validate primers using design software and check against databases.
Use master mixes to minimize pipetting errors and improve reproducibility.
Include proper controls: NTC, –RT controls, and endogenous controls.
Perform melting curves for SYBR Green qRT-PCR to confirm specificity.
Check RNA/DNA quality before starting the experiment.
Conclusion
Troubleshooting PCR is all about understanding the common pitfalls and learning how to fix them. From poor primer design to contamination and inefficient reactions, identifying the cause is the first step toward reliable results. Following these tips ensures your PCR experiments are accurate, reproducible, and efficient.


